In this blog post, we will explore the Email Templates settings in OJS and learn how to configure them to ensure effective communication with your journal’s authors, reviewers, and editors. We will discuss the different types of email templates available, including submission acknowledgments, review requests, and decision notifications.
You will also learn how to customize email templates, create new ones, and configure email settings such as the sender name and email address. By the end of this post, you will have a comprehensive understanding of how to optimize your Emails & Templates settings to streamline communication and enhance the user experience for your journal.
If you would like to learn more about other sections of the OJS Workflow, you can check out our other guides and tutorials:
However, for the purpose of this article, we will focus solely on the Review Settings section of the OJS Workflow.
Email Templates Settings in OJS #
Email Setup #
The Email setup of the system allows you to configure the various emails that are automatically sent out to users during different stages of the submission and review process. This includes emails sent to authors, reviewers, editors, and journal managers. By customizing the content and appearance of these emails, you can ensure that they are informative, professional, and consistent with your journal’s branding and messaging.
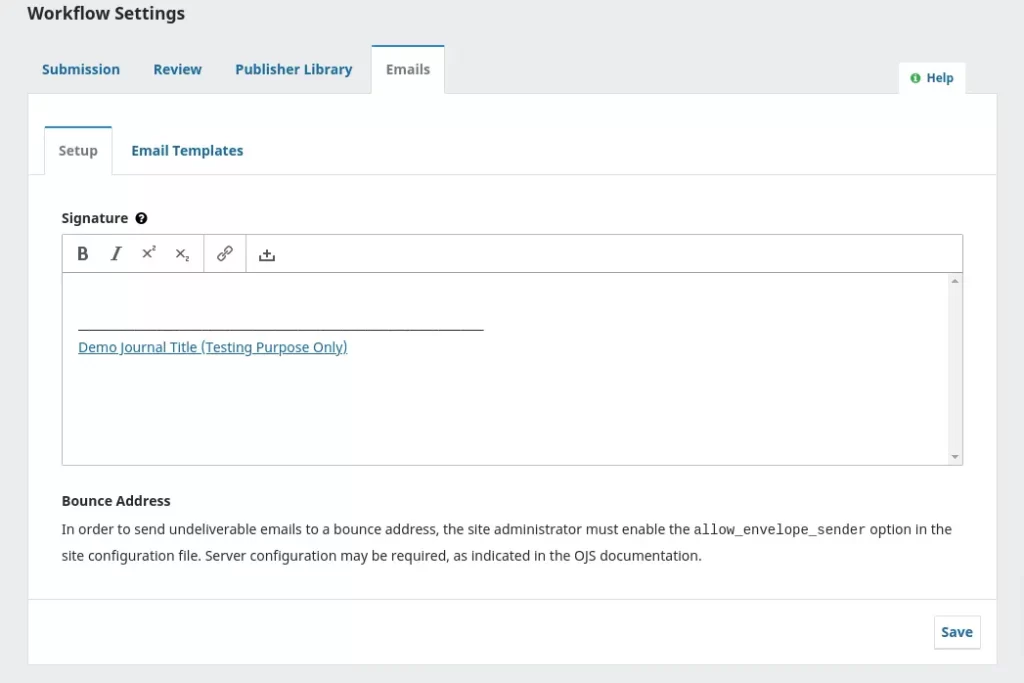
The Signature field allows you to add information that will appear at the bottom of every email sent out by the system. This can include your name, title, and any other relevant information you want to include.
The Bounce Address field is where you can specify an email address to which notifications will be sent in case an email sent by the system fails to deliver. For example, if the email address of the recipient is no longer valid, the system will send a notification to the email address specified in the Bounce Address field.
Email Templates #
OJS allows for streamlined communication through the use of prepared email messages. However, some configuration is required to send emails. For more information on how to configure email settings, please refer to the Administrator’s Guide.
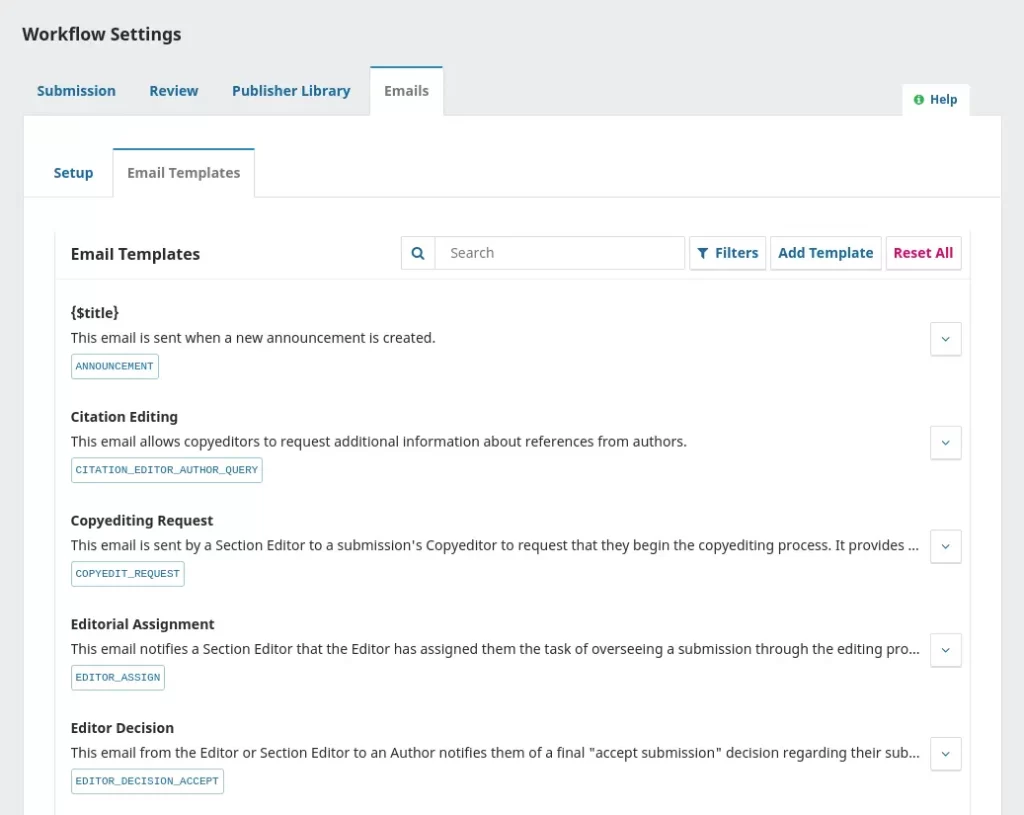
Under the Emails tab, you can view and modify the prepared email templates. Each email template’s title and summary are displayed in a list for easy access.
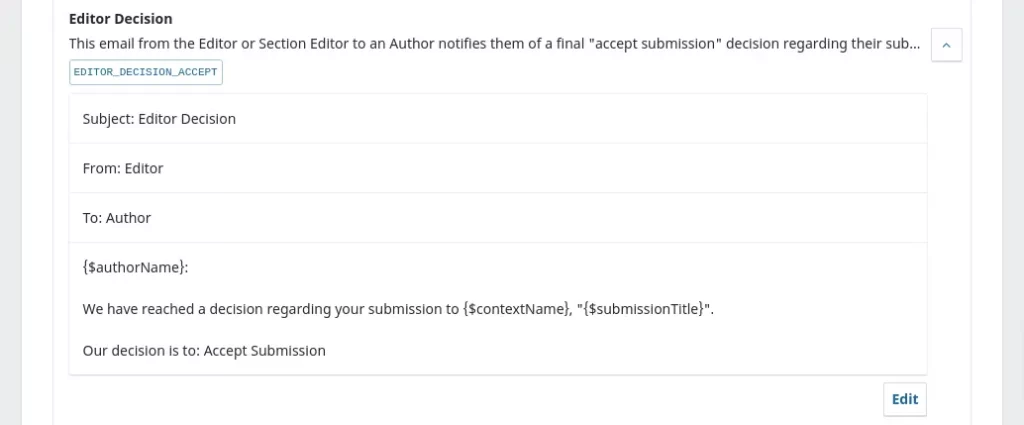
If you click the arrow beside each email template, you can view the subject and contents of the message, as well as the default sender and recipient. This information can be modified as needed to fit your journal’s workflow and communication needs.
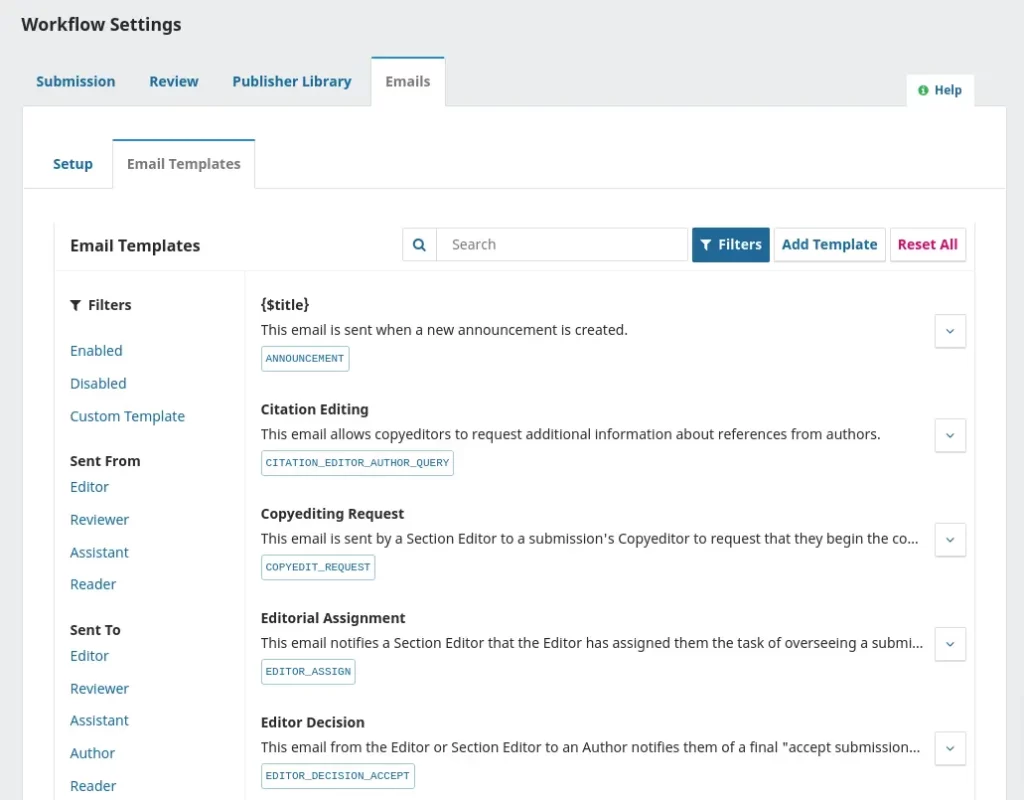
You can search for an email template by entering a keyword in the Search box. Clicking the Filters button will reveal options to filter the templates by status, sender, recipient, and workflow stage. These filters can help you locate specific templates you want to edit.
Edit email templates #
When you edit an email template, you are modifying the content that will be used every time the template is used to send an email. However, for emails that are sent on an ad hoc basis, such as a message sent to a reviewer asking them to review a submission, you can modify the content of the message at the time of sending it. These changes will only apply to that specific message.
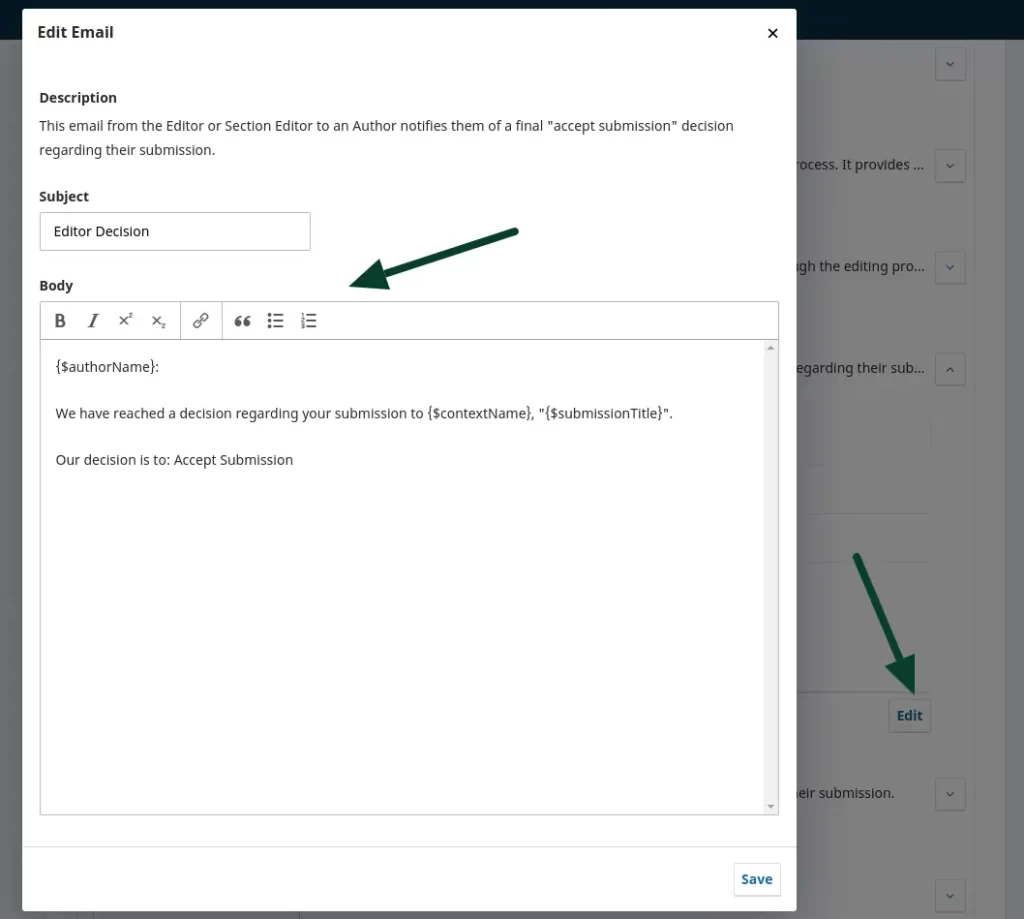
To edit an email template, follow these steps:
- Go to Workflow Settings > Emails > Prepared Email Templates.
- Find the template you want to edit in the list and click the blue arrow next to its name to reveal links below it.
- Click Edit.
- Make changes to the subject and body text of the template. Be careful not to delete any tags such as “{$authorName}:,” which automatically insert content from a submission.
- When you’re finished editing, click Save.
Disable email templates #
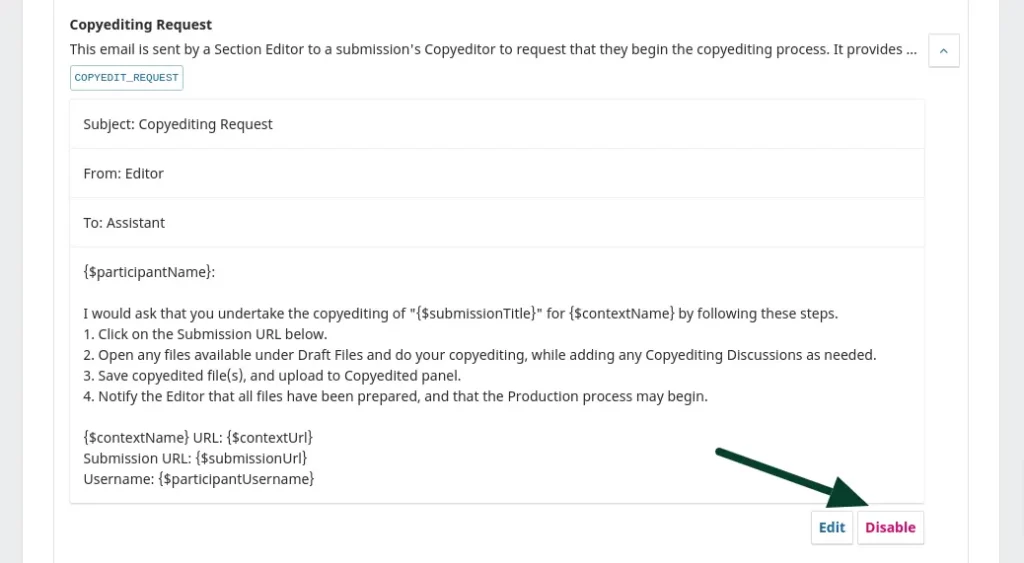
When you install OJS, all of the templates are enabled by default. However, you can choose to disable certain templates by clicking the Disable button. Most of the templates that can be disabled are automatic notifications sent by OJS. If you disable a template, the corresponding automatic notification will not be sent.
You can disable some templates in OJS, which are messages that are automatically sent by the system. To disable a template, follow these steps:
- Go to Workflow Settings > Emails > Prepared Email Templates.
- Click the blue arrow next to the template name to reveal links below it.
- Click the Disable button. Note that if the button does not appear, then this template cannot be disabled.
Reload default email templates #
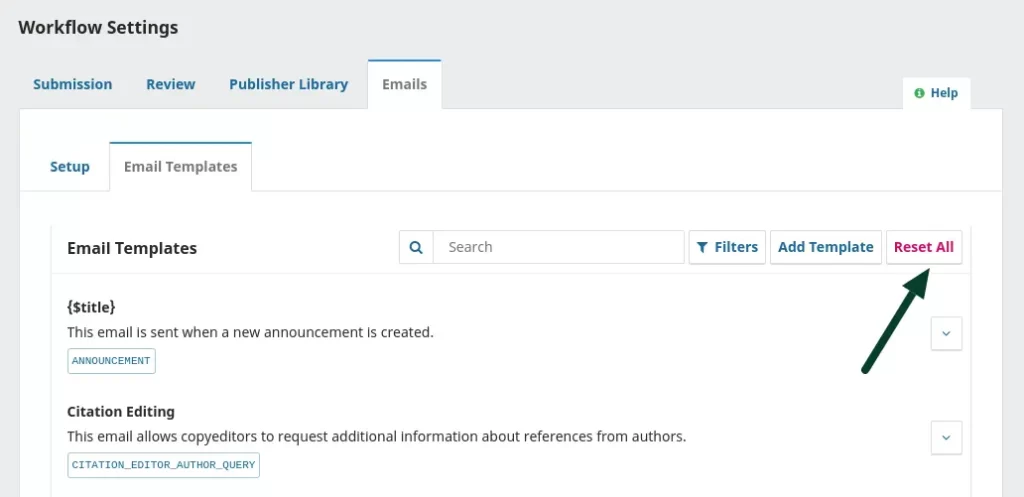
If you have made changes to email templates and want to revert them back to their original default contents, you can reset them by following these steps:
- Go to Workflow Settings > Emails > Prepared Email Templates.
- Click on “Reset All Templates”.
- When the confirmation message appears, click “OK”.
Add email template #
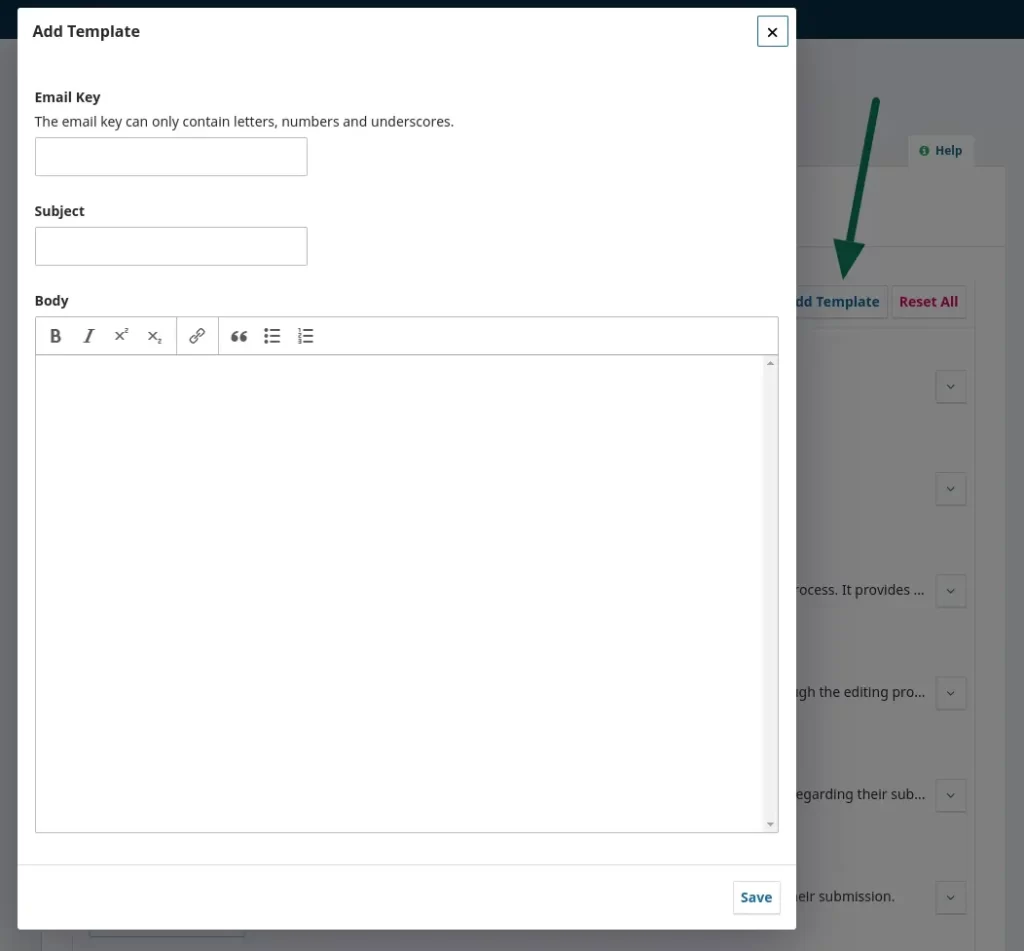
To create a custom email template, simply click the “Add Email Template” button. This allows you to customize a template for notifying users or adding participants to a submission. However, note that in versions prior to OJS 3.1.2, custom email templates can be created but cannot be used at any stage in the workflow.
Add email attachment #
While OJS 3 does not offer a direct option to attach files to emails, you can still share files with users by uploading them to the Publisher Library and including a link in the email. To do this, follow these steps:
- Go to Settings > Workflow > Publisher Library
- Click “Add a file” and upload your document. Make sure to check the “Public Access” checkbox.
- Click “OK” to generate the URL.
- Insert the URL in your email.
- Optionally, you can modify an existing email template with this URL, or share the document publicly on the website.”
Endnote
In conclusion, the Email Templates settings in OJS play a crucial role in facilitating effective communication between journal managers, editors, reviewers, and authors. By configuring these settings correctly, you can streamline your journal’s workflow and enhance the user experience for everyone involved. Whether you’re customizing existing templates or creating new ones, taking the time to optimize your Email Templates setting is well worth the effort. We hope this guide has been helpful in providing you with the knowledge and tools needed to configure these settings and improve your journal’s communication process.
If you would like to learn more about other sections of the OJS Workflow, you can check out our other guides and tutorials.
Please note that the information presented in this blog post is based on our current understanding of Open Journal Systems (OJS) as of the knowledge and has taken reference from PKP DOCS. As OJS is a constantly evolving platform, its features and functionalities may have changed since the publication of this post. Additionally, any recommendations or suggestions provided in this post are for informational purposes only and do not constitute professional advice. We disclaim any liability arising from your use or reliance on the information provided in this post. If you need any help with OJS, please feel free to contact our team.
If you need any help and support with OJS or journal services, please don’t hesitate to contact us. Our team is always ready to assist you.
We offer complete solutions like- OJS Website Design, OJS Hosting, OJS Upgrade, OJS Customization OJS Guide & Support.


